・ボタンをクリックすることで、効果を発揮できるようにする(今回はテキストでカウントアップ)
【ボタンとは】
ボタンを押下することで、例えば入力内容の送信や別のページへの遷移などのきっかけとすることができます。
【とりあえず単純にボタンを画面に表示してみる】
とりあえず、ボタンによる効果などを考えずにウィジェット上にボタンを配置することだけを考えてやってみます。あとで機能を加えたり、ざっくり修正するので、急ぎの方はこの部分を無視していただいても構いません。
ボタンを配置してみる
Widgetのbodyにテキストボタンを配置してみる。appBarは必要なければ書かなくて良いです。ただ、appBarと同じ並びにbodyと記述し、TextButtonを配置するんだなということがわかればOKだと思います。
home: Scaffold(
  appBar: AppBar(
    title: const Text('AppBar is here'),
  ),
  body: TextButton(
  ),
しかしこのままではボタンについてなにも詳しく書いていないので、以下の3つを書いていきます。
・onPressed : ボタンが押下された時にどういう動作をするのか
・style :何色か
・text :ボタンにはどんな文字が書いてあるのか
これらを書いたコードが以下になります。
home: Scaffold(
  appBar: AppBar(
    title: const Text('AppBar is here'),
  ),
  body: TextButton(
    onPressed: (){},
    style: ButtonStyle(
      backgroundColor: MaterialStateProperty.all<Color>(Colors.blue),
    ),
    child: const Text(
      '更新',
      style: TextStyle(
        color: Colors.white,
        fontSize: 20.0,
      )
    ),
  ),
),
ここまで書くと、以下のようになります。
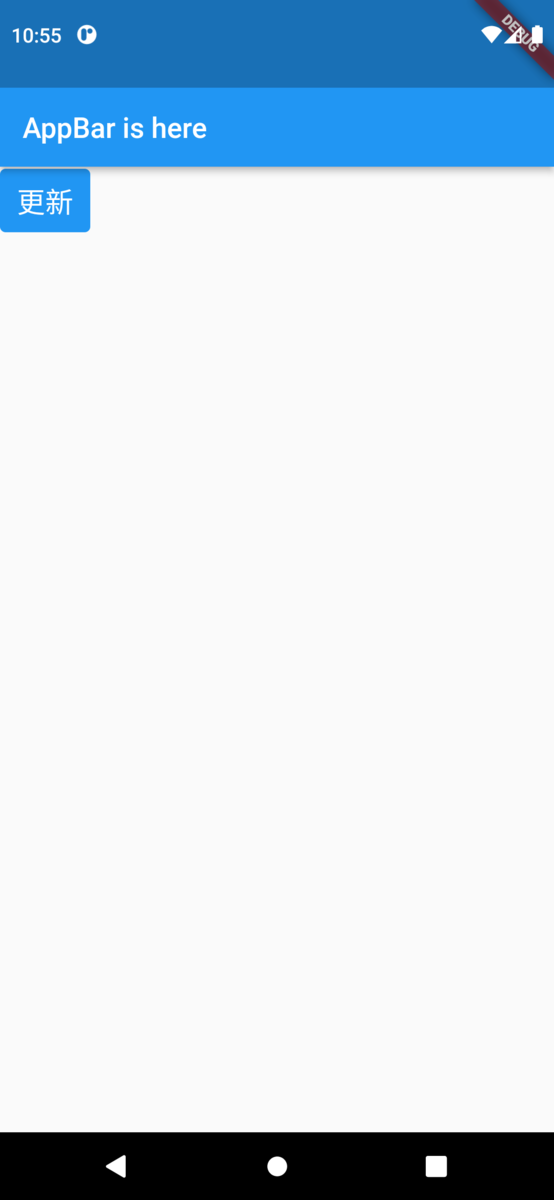
とりあえず、指定した通りに青色のボタンに対して白文字で’更新’と表示された押しても意味のないボタンが作成されました。
ボタンを中央に配置し直す
ただ左上に寄っているので、中央に配置しなおします。
そのためには
body: TextButton(),
となっているものを
body: Center(
child: TextButton(),
),
と変更します。
これを適用したコードが以下のようになります。
home: Scaffold(
  appBar: AppBar(
    title: const Text('AppBar is here'),
  ),
  body: Center(
    child: TextButton(
      onPressed: (){},
      style: ButtonStyle(
        backgroundColor: MaterialStateProperty.all<Color>(Colors.blue),
      ),
      child: const Text(
          '更新',
          style: TextStyle(
            color: Colors.white,
            fontSize: 20.0,
          )
      ),
    ),
  ),
),
これをやることで以下のようになります。

ここまでのコードのまとめが以下のようになります。
ただボタンを配置しただけなのでなんとなくそれぞれが何を意味しているのかがわかるようになっていますが、これから機能を付け加えるとごちゃごちゃになりそうです。
次の章ではこのコードを一度関数化していきたいと思います。
import 'package:flutter/material.dart';

void main() => runApp(const MyApp());

class MyApp extends StatelessWidget {
  const MyApp({Key? key}) : super(key: key);

  @override
  Widget build(BuildContext context) {
    return MaterialApp(
      title: 'about widget',
      theme: ThemeData(
        primarySwatch: Colors.blue,
      ),
      home: Scaffold(
        appBar: AppBar(
          title: const Text('AppBar is here'),
        ),
        body: Center(
          child: TextButton(
            onPressed: (){},
            style: ButtonStyle(
              backgroundColor: MaterialStateProperty.all<Color>(Colors.blue),
            ),
            child: const Text(
                '更新',
                style: TextStyle(
                  color: Colors.white,
                  fontSize: 20.0,
                )
            ),
          ),
        ),
      ),
    );
  }
}
【コードをクラス化・関数化】
コードがぐちゃぐちゃになってしまうのを防ぐために一度クラス化・関数化していきたいと思います。そうすることで後で機能を追加してもすっきりします。
具体的には
body: Center(
child: TextButton(),
),
となっているところに対してクラスを呼んでしまいます。
import 'package:flutter/material.dart';

void main() => runApp(const MyApp());

class MyApp extends StatelessWidget {
  const MyApp({Key? key}) : super(key: key);

  @override
  Widget build(BuildContext context) {
    return MaterialApp(
      title: 'about widget',
      theme: ThemeData(
        primarySwatch: Colors.blue,
      ),
      home: Scaffold(
        appBar: AppBar(
          title: const Text('AppBar is here'),
        ),
        body: const Center(
          child: ChangeForm(),
        ),
      ),
    );
  }
}

//Stateful Widgetを継承したクラスを作成
class ChangeForm extends StatefulWidget{
  const ChangeForm({Key? key}) : super(key: key);

  @override
  _ChangeFormState createState() => _ChangeFormState();
}

class _ChangeFormState extends State<ChangeForm>{

  @override
  Widget build(BuildContext context){
    return Container(
        padding: const EdgeInsets.all(50.0),
        child: Column(
          children: <Widget>[
            TextButton(
              onPressed: _handlePressed,//ボタン押下でsetStateを呼び出す
              style: ButtonStyle(//色設定
                backgroundColor: MaterialStateProperty.all<Color>(Colors.teal),
              ),
              child: const Text(
                '更新',
                style: TextStyle(
                    color: Colors.white,
                    fontSize: 20.0
                ),
              ),
            )
          ],
        )
    );
  }
}
Textとカウントアップの機能を追加
_ChangeFormState内にボタンを押下した時に呼ばれる関数を追加
int _count = 0;//ボタン押下カウント用変数
void _handlePressed(){//ボタン押下時に呼ばれる関数
  setState((){//setStateを呼び出すことで更新をする
    _count++;//カウントを+1する
  });
}
また、カウントを表示するTextを追加
Text(
  "$_count",
  style: const TextStyle(
      color:Colors.blueAccent,
      fontSize: 30.0,
      fontWeight: FontWeight.w500
  ),
),
ここまで実施すると以下のようになります。
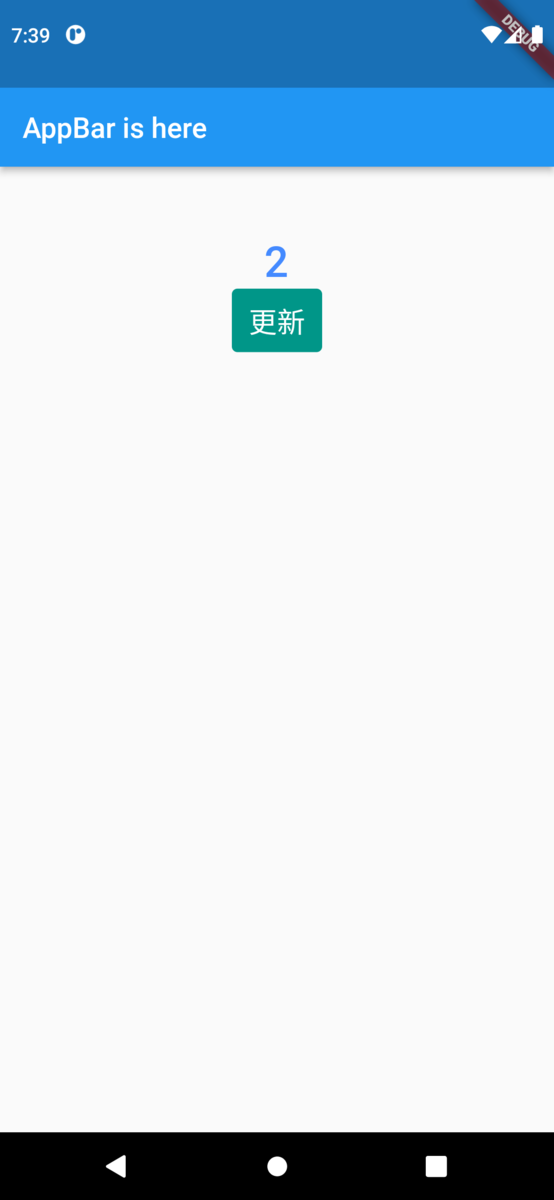
以上が今回の目標を達成するまでの流れになります。
最後に全体のコードがこちらになります。
import 'package:flutter/material.dart';

void main() => runApp(const MyApp());

class MyApp extends StatelessWidget {
  const MyApp({Key? key}) : super(key: key);

  @override
  Widget build(BuildContext context) {
    return MaterialApp(
      title: 'about widget',
      theme: ThemeData(
        primarySwatch: Colors.blue,
      ),
      home: Scaffold(
        appBar: AppBar(
          title: const Text('AppBar is here'),
        ),
        body: const Center(
          child: ChangeForm(),
        ),
      ),
    );
  }
}

class ChangeForm extends StatefulWidget{
  const ChangeForm({Key? key}) : super(key: key);

  @override
  _ChangeFormState createState() => _ChangeFormState();
}

class _ChangeFormState extends State<ChangeForm>{
  int _count = 0;

  void _handlePressed(){
    setState((){
      _count++;
    });
  }

  @override
  Widget build(BuildContext context){
    return Container(
      padding: const EdgeInsets.all(50.0),
      child: Column(
        children: <Widget>[
          Text(
            "$_count",
            style: const TextStyle(
              color:Colors.blueAccent,
              fontSize: 30.0,
              fontWeight: FontWeight.w500
            ),
          ),
          TextButton(
              onPressed: _handlePressed,
              style: ButtonStyle(
                backgroundColor: MaterialStateProperty.all<Color>(Colors.teal),
              ),
              child: const Text(
                '更新',
                style: TextStyle(
                  color: Colors.white,
                  fontSize: 20.0
                ),
              ),
          )
        ],
      )
    );
  }
}
まとめ
ウィジェットを使うことでテキストを表示、ボタンを表示することができました。
またボタンを押下したときに呼び出す関数の中に、表示を更新するものを使うことで、カウントをアップさせることができます。